Install & open
Two steps from download to your first note. Thoughts lives in the menubar — always one click away.
- Open the Thoughts .dmg file you downloaded, then drag the Thoughts app icon into your Applications folder.
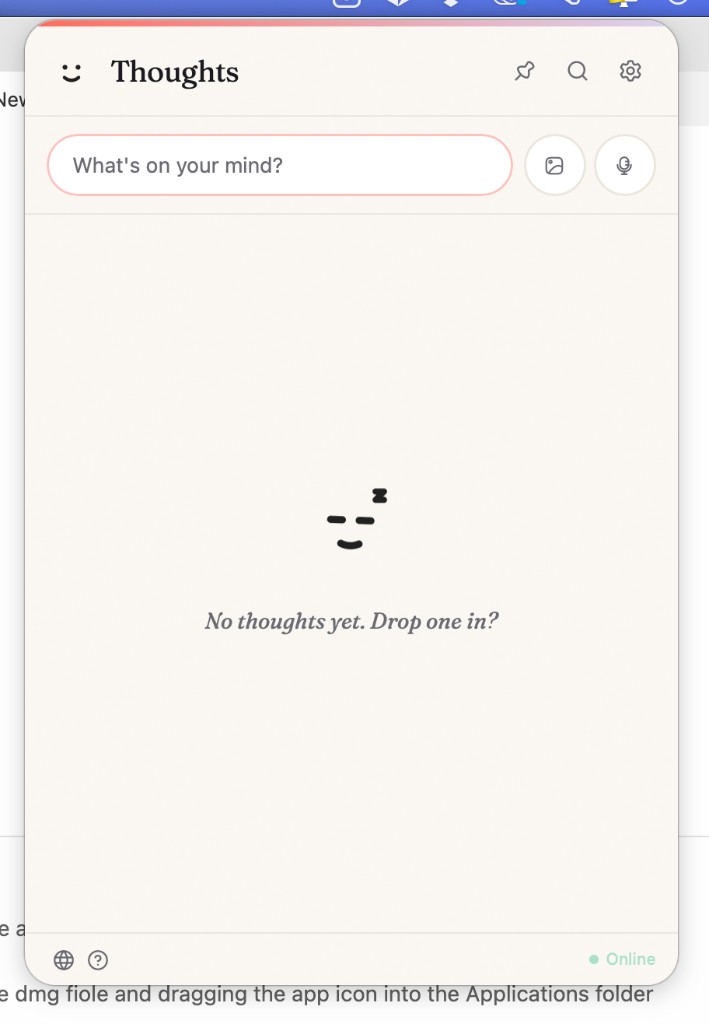
- Launch Thoughts from Applications. The app lives in your menubar — look for the smiley face icon and click it to open the popover.

Text notes
Click What's on your mind? and start typing. The input box expands as you write.
Card menu
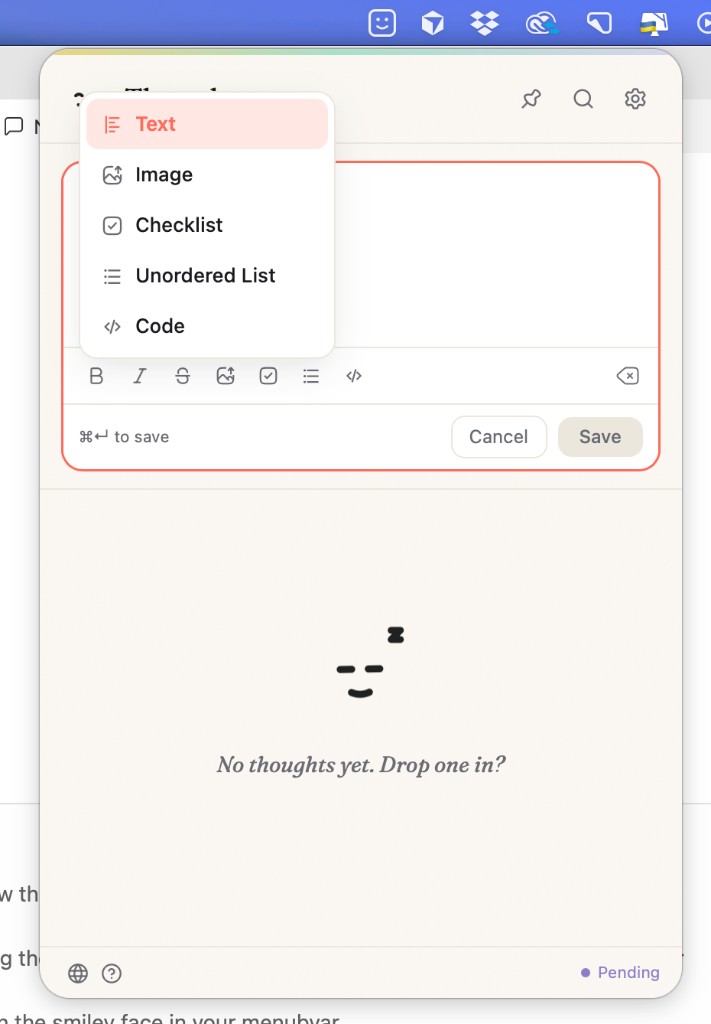
Press / to open the card menu. From there you can insert:
- Text — a regular paragraph
- Image — an inline image block
- Checklist — tickable to-do items
- Unordered list — a bulleted list
- Code — a code block
While you write
- Shift + Enter — new line, or a new checklist item inside a checklist
- Enter — new paragraph
- Backspace icon (top right of the composer) — clear the whole draft
- ⌘ + Enter — save the note, or click Save
- ⌘ + B, ⌘ + I, and ⌃ + ⌘ + X — bold, italic, and strikethrough
- ⌘ + C, ⌘ + X, and ⌘ + V — copy, cut, and paste
Voice notes
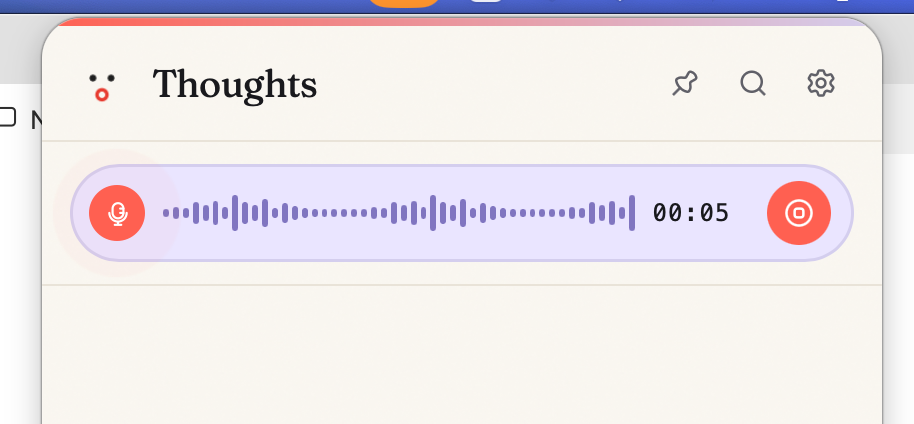
Press the microphone button next to the text field, then talk. The button turns red while you are recording. Press the red stop button (square icon) to finish.
In Settings → Capture, choose the correct Microphone, set Max recording, and adjust Playback volume. Turn on Auto-transcribe audio notes if you want a transcript added automatically when you save a voice note (requires an AI API key — see below).
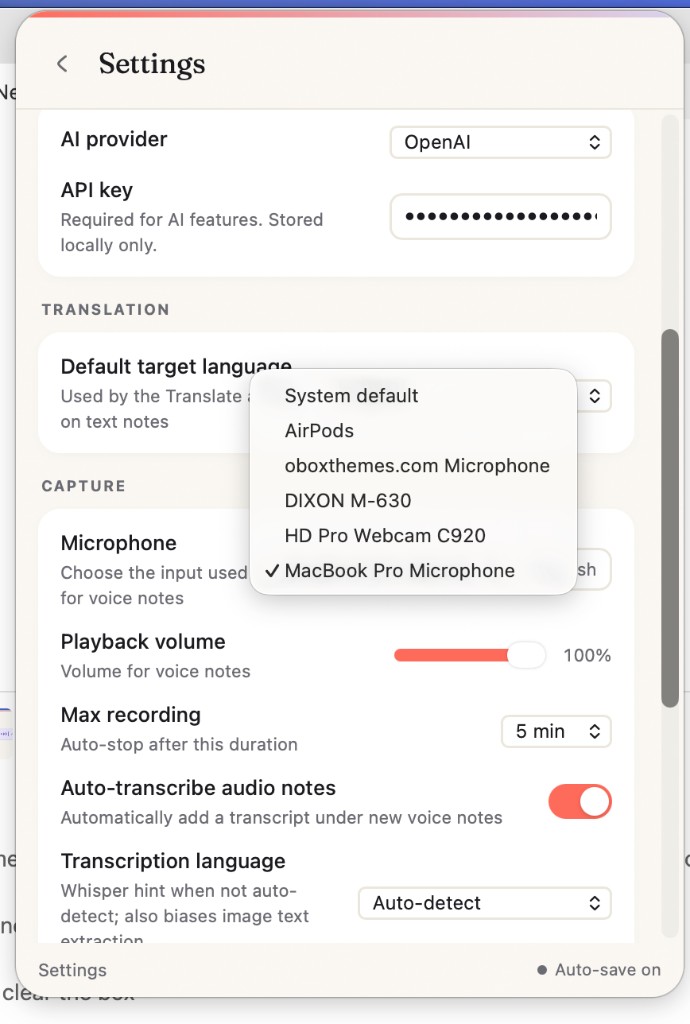
Image notes
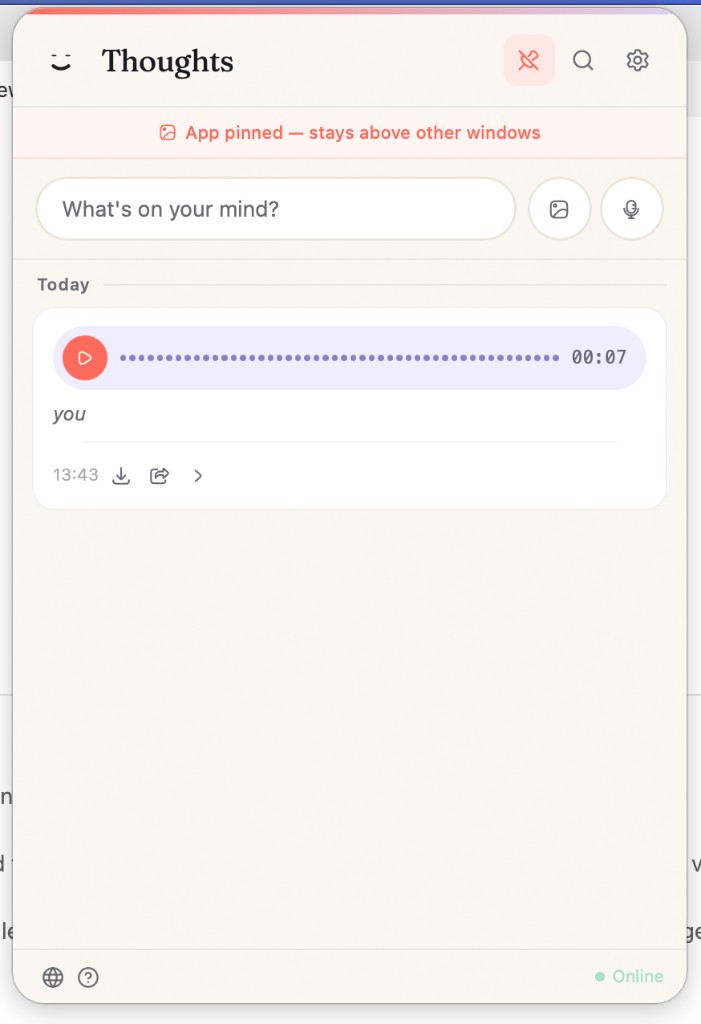
Pin the app first (pin icon in the top right), then drag an image into the What's on your mind? box or anywhere in the main app body. You can also use the image button beside the microphone, or insert an image block with /.
Tip: Pin the app before you drag images in. Pinning keeps Thoughts open and floating above other windows, which makes drag-and-drop much easier.
Your notes
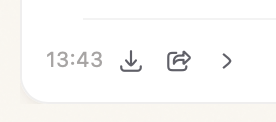
Saved notes appear in your feed, grouped by day (for example, Today). Each note card has a footer with the time and action icons.
Detail view
Click the small arrow (>) in the note footer to open the detail view. Tap Actions at the bottom to see everything you can do with that note (AI tools, export, and more).
Share & delete
- Share (square with arrow) — send text notes to Notes, Messages, Mail, and other macOS share targets.
- Export (download icon) — save that note in the best format (text, image, MP3, or PDF).
- Delete (trash icon) — click once to arm delete, then click Confirm to remove the note permanently.
You can also export all notes at once from Settings (see Data below).
AI setup
Thoughts does not run AI through a shared account. You connect your own provider so transcription, OCR, rewrites, and translations use your API key. Keys are stored locally on your Mac only.
Add your API key
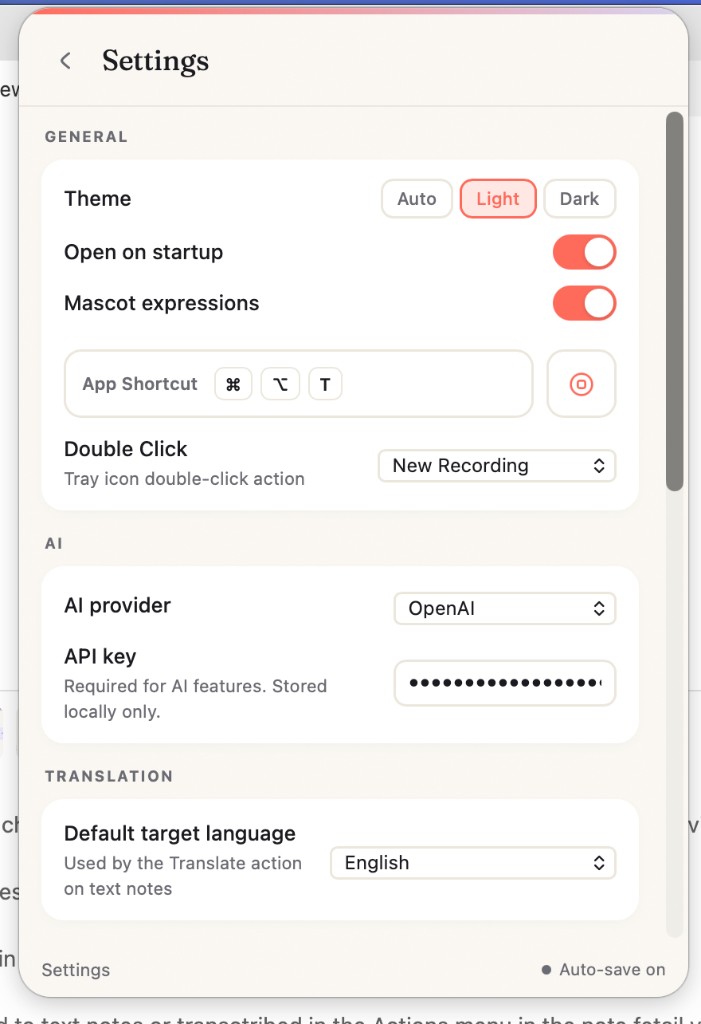
- Open Thoughts and click the gear icon (Settings) in the top right.
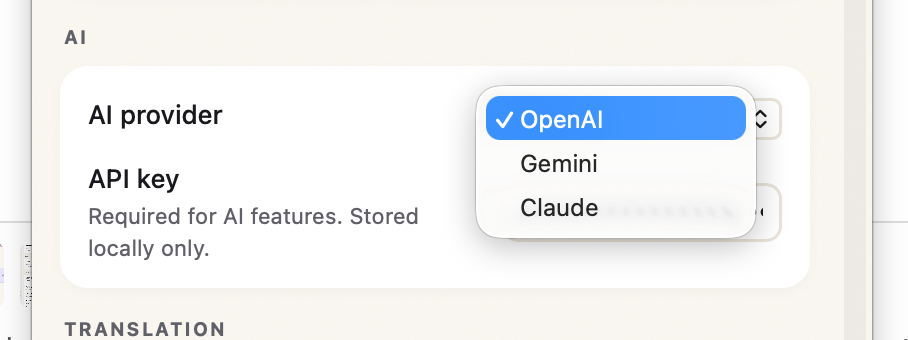
- Scroll to the AI section.
- Choose your AI provider: OpenAI, Gemini, or Claude.
- Paste your API key into the field. It is masked like a password. Settings auto-save — look for Auto-save on in the footer.
Where to get a key
- OpenAI — create a key at platform.openai.com/api-keys. Keys usually start with
sk-. Used for transcription (Whisper), text actions, and image text extraction. - Gemini — create a key in Google AI Studio. Keys often start with
AIza. Supports transcription and text actions. - Claude — create a key in the Anthropic Console. Keys usually start with
sk-ant-. Great for text rewrites; voice transcription requires OpenAI or Gemini, not Claude.
Related settings
- Translation → Default target language — default language for the Translate action on text notes. You can still pick another language per note in the Actions menu.
- Capture → Auto-transcribe audio notes — when on, new voice notes get a transcript automatically (OpenAI or Gemini key required).
- Capture → Transcription language — Whisper hint when not set to Auto-detect; also biases image text extraction.
AI actions
With a valid API key, open any note's detail view and expand Actions. Available actions depend on the note type.
Text notes
Shorten
Tightens your note while keeping the meaning — useful for long drafts.
Lengthen
Expands brief notes with more detail and context.
Summarize
Produces a shorter summary of the note content.
Fix spelling
Corrects spelling and typos without changing your tone unnecessarily.
Translate
Rewrites the note into another language. Pick from the language list, or use your default from Settings.
Convert case
Changes letter casing: UPPER CASE, lower case, Title Case, or Sentence case.
Convert to Text
For notes that contain images: extracts text from embedded images and turns the note into readable text (OCR).
Image & voice notes
- Image notes — Extract Text pulls text out of the image; Convert to Note turns it into an editable text note; Summarize gives you a short summary of extracted content.
- Voice notes — Transcribe creates or refreshes a transcript; Convert to Note turns the recording into an editable text note; Summarize summarizes the transcript.
In the detail view for image notes, use Actions → Extract Text (or the image-to-text flow above) to change an image into editable text when AI is enabled.
Pin & search
Pin the app
Click the pin icon in the top right. Pinned mode keeps Thoughts open, floating above all other apps. You can drag the window anywhere on screen while it is pinned. Click the pin again to unpin.
Search notes
Click the magnifying glass to open search, then type in Search your thoughts…. Search matches note text, checklists, link previews, and filenames as you type.

Keyboard shortcuts
⌘ + Enter — save the current note.
⌘ + B, ⌘ + I, and ⌃ + ⌘ + X — bold, italic, and strikethrough.
⌘ + C, ⌘ + X, and ⌘ + V — copy, cut, and paste.
⌘ + H — hide Thoughts.
⌘ + Q — quit Thoughts.
You can set a custom App Shortcut under Settings → General to open Thoughts from anywhere (default is often ⌘ + ⌥ + T).
Settings
Open Settings with the gear icon. Changes save automatically.
General
Choose your theme (Auto, Light, or Dark), whether Thoughts opens on startup, mascot expressions, the global app shortcut, and what happens when you double-click the menubar icon — start a New Recording or a New Text Note.
AI
Pick your provider and paste your API key. See AI setup for where to get a key and which features each provider supports.
Translation
Set the default target language used by the Translate action on text notes. You can still choose a different language per note in the Actions menu.
Capture
Choose your microphone, playback volume, maximum recording length, whether new voice notes are auto-transcribed, and the transcription language hint.
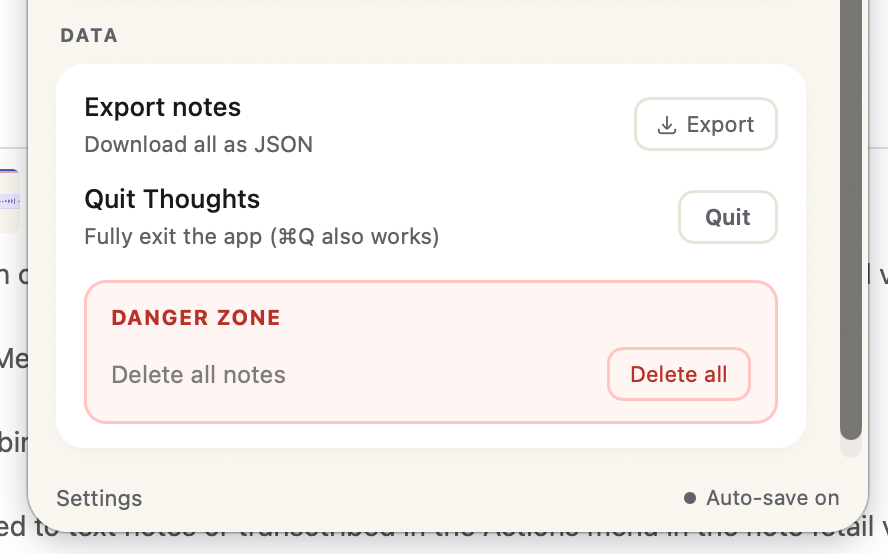
Data
Export notes downloads everything as JSON. Quit Thoughts fully exits the app (⌘ + Q works too). In the Danger Zone, Delete all removes every note after you confirm.